Friday, February 17, 2012

1 a-Penny, 2 a-Penny, 3 a-Penny 4

About 6 months ago, we were leaving Sadie's school and I heard another mom tell her son that if he didn't get in the car right then, he was going to loose a marble.  I thought she had lost her marbles! The marble jar is great for school (which is basically a lesson in conforming).  No one wants to be the kid that looses a marble for the whole class; therefore, every kid tends to be on their best behavior! 

As a parent, I don't want to have to trick my child into minding me...I just want her to do as I say; however, as I thought about our situation, I realized that my way wasn't really working either.  So after brainstorming, I came up about 3 discipline methods which we are using right now.  

1. The Behavior Jar-Yes, even though I thought it was a ridiculous thing to do at home, I think I've tweaked it to make sense.
Here are the rules of the Behavior Jar:
  • 1 good deed earns 1 penny (no more, no less) we realize this will need to increase with age
  • 1 bad (don't like using the word "bad" but...) behavior looses a penny (no more, no less)
  • Only Sadie can put the penny in, and we state the behavior that the penny was given for before she puts it in.
  • Only Mom, Dad (or whoever is in charge of Sadie at the time) can take a penny out
  • Loosing a penny isn't a "get outta good behavior free card", she still has to do as she's told.  If she does it nicely she earns a penny if she doesn't do it nicely, she looses a penny one at a time until she does as told-One morning when we were trying to get her ready, she said, "I don't want to get dressed, just take a penny out", hmm...it doesn't really work that way, but I like the negotiation skills :)
  • Hitting or saying she hates someone, is an automatic penny withdrawal 
  • We use a glass jar so she can see her pennies and know how well she is doing
  • Once the jar is full or to a certain level, she gets to spend the money (her first lesson in Economics :) )
It took Sadie 3 weeks to earn this many pennies (135 pennies)
She wanted to buy her own pack of gum with her money.  First we took her to CVS and then the gas station, but the gum was $1.50.  She's on a fixed income...and can't really afford that!
So we took her to Dollar General where all the gum was $1.00.  She chose orange gum tape.
She had to tell the cashier how she earned her money.  You can see the surprised look on the cashier's face.  Since you don't know what I know, you probably just think the cashier is just engaging in the conversation...but I know that this lady has seen Sadie throw many fits in this store and really is surprise that she could have this much good behavior in 3 weeks.
$1.05, she has $0.30 change!
Very proud of her purchase, and she has already staked out what her next purchase will be...gummy worms!

2. Counting Backwards-
Counting also seems ridiculous but she is very competitive and the goal here is for her to complete a certain task before we get to #1.  We always start with 10 and go down so she isn't compelled to keep counting and try to earn herself more time. We make it seem like a fun game, and stretch out certain numbers as needed for her to win or almost win.  I've seen her go from throwing an outfit she didn't want to wear to me saying "10" and she starts saying to herself, "I've gotta hurry, I've got to hurry faster" and she will grab what she didn't want to wear and try to get it on as fast as possible!  

3. Providing (verbally) the what (we want her to do)and the why (the reason...as if she is an adult, lol, but it actually works).
Here's an example:  We were at the park and it was time to leave.  Sadie started to throw a fit and I said, "Here's the deal, if you throw a fit now, this is what we will think about next time you want to come to the park and we will remember our experience at the park as a bad one because you acted naughty when it was time to go.  If you walk away like a nice lady right now, we will have a good memory of the park and we will be more likely to bring you back.  It is your decision right now, how we leave the park, nicely or ugly, but either way, we are still leaving right now".  She said, "Okay, bye park".  Dustin and I both looked at each other in disbelief...that actually worked, wow!

There is one more emergency technique we use.  This is when she is being impossible and nothing seems to fix it.  At this point it almost seems like she is acting naughty because we expect her to keep acting that way.  This is when we get creative and we might have her:
  • put her attitude, crying, etc. in our hand and then we take it to the toilet and flush it all away so there is nothing left but a happy Sadie
  • open up the front door and throw it out (okay, not just Sadie, this was for the older girls too)
  • Scribble her anger on a dry erase board and then wipe it all away
Or anything else I can come up with at the time, it's just a way to tell her that we aren't mad at her and it's more fun being happy than sad and angry!


Monday, February 13, 2012

Soda Cool Gift Idea!

So years ago, before pinterest :) there wasn't really a way to "share" ideas, so if you were crafty your two (cheap) options were, create an idea yourself OR peruse your local gift store and "borrow" their ideas.  This one I "borrowed" about 13 years ago, it's been long enough now that my darling daughters think it's "my thing",...and I don't really correct them.  These are great for slumber party goody-"bag" gifts, school party treats, teachers gifts, etc. etc.

So here we go:

Items needed:
cans of soda (pop, soda pop, or the "coke" of your choice, lol! depending on which part of the country you're from)
a piece of thin cardboard or paper plate
glue gun and glue sticks
marker
candy (the kind in wrappers)

Trace around the top of the can
Cut out the traced circles
 Add a decent size glob of glue to the center of the can
 Glue on the cardboard circle
apply a generous amount of glue to the middle of the cardboard
 Glue the tallest pieces of candy first, and keep a hold of each piece since, the glue doesn't really harden up that quickly before the candy tries to fall off.
 Continue to add layers of candy around the top of the can, spacing candy out evenly
For the remaining pieces, I put the glue directly on the candy wrapper and squeezed them in the middle of the other pieces, to make it look fuller
To complete the look, tie a bow around the can, and that's it!
Hailee, is pouting because they aren't for her :) I knew she thought it was awesome when I gave these to her class about 4 or 5 years ago, but I didn't know she still thought they were so great.  She is allowed to use the hot glue gun and in the Summer, she and her friends walk to CVS and buy candy...she could totally make this herself, so not real sure why this is so upsetting to her :)

Our other Valentine craft projects this year were, Valentine cookies and Valentine Cards.
Aubree, Hailee and Felicity should never be agents the way they were coaching Sadie and her "modeling" for her Valentine Cards.  At one point she was trying so hard to smile right and do the sign for "smart" at the same time, that she was shaking and her smile looked a little scary! Her first few shots of her blowing a kiss turned out cute though, so that's what we used.

A Kiss for My Valentine

Our other ideas were: 
1. Sadie signing smart, with the card saying, "from one Smartie to other" with Smarties candy affixed to the card.
2. Sadie doing the "call me" sign, with the card saying, "call me your Valentine"
Awh...a happy Hailee! Dustin surprised his lovely wife and four darling daughters with flowers and candy  on Valentine's morning :)


Sunday, February 5, 2012

Terrarium territory

ecosystem  ec·o·sys·tem (ěk'ō-sĭs'təm, ē'kō-) n. 
An ecological community together with its environment,functioning as a unit.

Yep, we did that, in terrarium form!  

Aubree and I, individually, had both wanted to make our own terrarium, through pinterest we realized this was something we had in common.  I don't think that either of us are exceptionally good with foliage, I think we are both just control freaks and we view our own ecosystem as our own little world we get to control :)

Either way, we decided that this would be the weekend for us to make our terrariums!  We sought the expertise of my mom-in-law, Terri (although she's never made a terrarium herself...she IS a retired teacher, she will know what to do!) We also read...well...looked at pictures and diagrams of terrariums others have made online.  

It took a couple of different stores but we ended up finding everything we needed!

Pretty glass jars, rocks, small pebbles, sand, moss (called for Spanish Moss, but Terri had American Moss...That seems fair), Crushed Activated Charcoal (we just used the leftover Kingsford from this Summer), potting soil, and pretty plants.
Terri and Aubree crushed the charcoal
Crushed activated charcoal...hmm this makes me think of an emergency room trip from about 10 years ago. Hailee decided to climb up to the medicine cabinet, put a pain pill in her mouth, run to me and stick her tongue out and show me the pill in her mouth!  I had no idea if she had taken anymore than the one on her tongue, so she had to be taken to the emergency room.  The hospital staff didn't have anyway of knowing if she had taken any more, either, so they made her "drink" a cup of activated charcoal. It was thick, and looked like tar!  Gross!  I told her it was delicious, pretending to drink it myself and after each "drink" she took, she would gag and make horrible faces and I would say, "try it again, maybe this time it will taste like strawberries...maybe this time it will taste like chocolate". So glad she never did that again!

The Order (from the bottom up)
Layer 1-rocks
Layer 2-pebbles
Layer 3-American Moss
Layer 4-Charcoal (Crushed)
Layer 5-sand
Layer 6-potting soil
pretty plants
a little water


Putting in their rock layer...Terri and her Terri-arium, lol!
Sprinkling in the Sand
:) Posing for the picture :)
In order: Mine, Sadie's, Aubree's, and Terri's

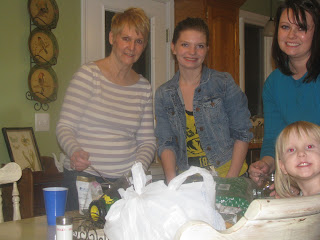
Yes, mine is the biggest because it is for our kitchen and Sadie got a mason jar because she decided after "helping" me put rocks and extra rocks in mine, that she wanted to make her own :). Aubree's and Terri's are the same size and with all our layers it would've been easier to use taller jars.  Sadie must have thought hers was a snow-globe because the first thing she did after her lid was on, was shake it :)
A closer view

They turned out pretty well; although, these were our second attempts.  Our first version looked like sand art with about two inches to spare at the top...for our plants... oops!  We used smaller layers for our second attempt.

My terrarium now resides on the kitchen table and along with my two plants, I now have a ceramic bunny and a giraffe in my mini jungle...together with their environment, functioning as a unit in my own ecosystem!


Wednesday, February 1, 2012

DIY Applesauce

While grocery shopping on Saturday, I decided that our family needed more vegetables.
So I bought (lots of):

1. zucchini
2. squash
3. carrots
4. green peppers
5. red peppers
6. yellow peppers
7. onions
8. corn-on-the-cob

I felt pretty good about the healthy choices I had made...until it was time to put them away!  I didn't have enough room in either of the crispers...because...it was still full of apples, oops!  
(Okay, you've got me, these are red delicious which is not the kind I used, but I started boiling them before I realized that I was going to share this moment with the world, the picture moment was missed)

My mom had picked up some apples from the orchard in early Fall.  She made applesauce from the inside of the apple, and apple jelly from boiling the peelings. Although they both sound delicious, the amount of work required made it a little un-a"peeling" to me :)

I didn't start with a recipe book, I just threw the apples in a large pot and started boiling them (with the skins on).  I don't have a good reason why I left the skins on,  I was just (in a hurry) trying to get the apples out of my way so I could put away the groceries. :)
This is a few of the apples I boiled.  Once I started pulling the skin off  the apples, the stuff inside already looked like applesauce and I realized that I better get the camera out...this was so easy, I had to share it!
I boiled the apples until they were soft.  Once they were soft, I pulled the peelings off and pulled out the core.  Make sure you get all the seeds! I put the pulp of the apple in the foley foodmill and turned the handle until all the apple went through.  This went very quickly sense it was already mushy!
Apple being sifted through the foley food mill
I think this one is self-explanatory :)
 At first I thought maybe I would leave it plain, but it kinda just tasted like mushy apples.  I added in raw sugar (all I had were the little packets, I'm showing the box here so you don't think I stole them from a restaurant :)) I decided at least raw sugar was a little better than the refined stuff...I mean, I did just go fill the crisper with veggies...
raw sugar+heart=pure love :) lol!
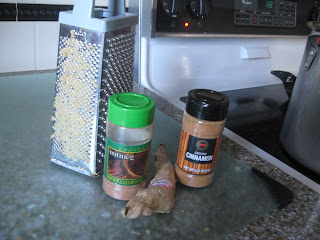
I also added, Cinnamon (fair amount), Nutmeg (fair amount), and Ginger (descent amount)
Something I still remember from Home-Ec, don't lean over the pan, fan the scent toward you.  This way the hot mixture doesn't pop-up at you and more importantly, less likely to have hair fall in! 
It smelled like it was going to taste delicious!
It looks delicious, tastes delicious and left a delicious amount of room for the veggies in the crisper. 
There was enough for a half a quart for the frig. and two pints for canning. 
For canning instructions, please see my previous blog, "First you take the Grapes..."
Now wasn't that easy?!


Blogging tips