Monday, February 28, 2011

Project 2: Doll House Day 2

Sadie and I decided that Project 2: Doll House might be a little much for just the two of us so we decided to do a little recruiting.
Painting the door
As self-proclaimed Project Manager, I was determined to keep full control of the project J
Sadie being Head Creative Director/Painting Coordinator, she was also determined to keep full control of her portions of the project.  No artistic interpretations, Daddy…leave that to the professional!
 Painting the bay windows
The Front Door!
The outside of the house is now yellow!
I didn’t want to pay $10 for “doll house” wall paper paste…so I made my own. 
 Home-made Wall Paper Paste
½ Cup Flour
1 Cup Water
1 ½ T. Salt

Mix together, should be the consistency of yogurt. 
Sadie showing Aubree how to apply the wallpaper paste.
Hailee trims down the wallpaper.
Turns out, I'm not any better at wallpapering a little board than I am an entire room...I thought it would be easier (this is one reason I no longer try to put up wallpaper).  Sadie picked out this pattern.  I love it.  Just to keep to the old antique feel I made sure the wallpaper had plenty of wrinkly lines in it.  I could've smoothed them out (yeah right) but that would've lost the affect.  

Sunday, February 27, 2011

Successful Slumber Party!

Felicity is about to turn 11.  Just like every year, the day after Christmas, Felicity begins her count down to her birthday (March 2nd).


Out of the 8 girls she had invited, 6 were able to come. A great turn out!  The night consisted of Chocolate cake, Justin Bieber accessories, ice skating, and lots of fun.

The "confetti" on the table is actually rub-on tattoos!  I decided to buy a cake this time, since her little sister was sick...less time and less germs!  They also had more tattoos, a pop confetti firework, and a fold up brush and mirror in their treat bags.  I bargain shopped and the treat bags ended up only costing less than $2.00 a piece!
We had planned to have them play the spin-the-nail polish bottle game but a couple of girls already had their nails painted when they arrived.  That's probably okay, 7 girls and different colors of nail polish sounds like the green machine...or a magic wand to get all the colors out of her carpet.

Make a wish!
Dustin brought 4 large pizzas...Only 2 were ate? Wow!
 Even with our help!
Lots of nice gifts! She loved this one.  A wrapped Kleenex box with a note that says "Pull Here".  This is what she pulled out!
Hailee eating a piece of birthday cake!  Yummy!
Aubree...Not a Bieber fan :)
The girls thought the ice rink at the Independence Event Center was pretty "cool"!
Felicity and her "twin" JQ :)  (I actually kind of see it here!)
Taking a snack break...and resting their new blisters...note to self...carry band-aids!
Playing games, coloring and probably talking about boys!
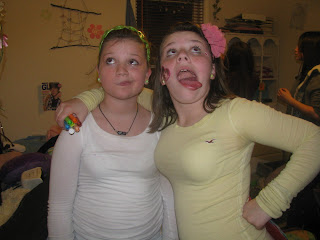
Silly faces!
So Silly!
Completely Silly!

The party went wonderfully!  One of the girls present had such a great time, she is going to have the exact same party for her birthday!  Same girls, different house :)  There was zero fighting, which is really amazing when you get a group of 7 girls together!

The best part for me was, while they were skating I was able to peacefully enjoy a book.  A nice break after staying up with a sick baby all night :)


Thursday, February 24, 2011

Stick-On Everything!

Sometimes I make rules for myself and one day I will wake up and say, "why is this my rule?"
I will challenge that rule by doing the exact opposite.  I walk out of the house feeling all confident, like, "yes! I'm not bound by silly rules.  I can do whatever I want to do!"

Today was one of those days!  I had just bought this new medium pink nail polish.  It goes on fast and it dries fast. A perfect combination!  So this morning I really wanted to try it out, but I never wear colored nail polish to work; they're either bare, clear coat or French tip.  Another one of my ridiculous rules!  So I painted right over the French tips with medium pink.  The all-in-one form of the nail stick made the application quick (just like I knew it would) and it also dried quick (just like the label said). As I walked down the steps into the garage I could hear the song, "I'm coming out, whoa...
Yes, once again not bound by ridiculous rules.

After being at work for about 5 minutes I remember why I had created that "silly" rule.  Medium pink lines all over the papers I had barely touched.  How does this happen?  I spent my entire day today barely touching the edge of pages in fear that I would have to spend the next day reprinting every item!

As soon as I got home I removed the medium pink nail polish and the new nail stick will be inherited by one of my four darling daughters!

Instead of going back to colorless nails, I decided to try the other item I had purchased...stick on nail polish!  I know it sounds ridiculous but they are supposed to stay on for 10 days and there is no down-time for drying!

There are 15 nails in the box and the box was only $2.00.  Sounds like a good bargain. That would be $4.00 for 30 days of nails, right? (I say, "right?" here, because that isn't really right at all.  There are many different sizes within these 15 and the goal is to match 10 of them to the same size as your 10 fingers.  It's supposed to be one size fits all, but I don't really think that is possible!) The nails came in 2 colors, shiny goldish and hot pink. Goldish seemed a little more flexible, so I went with the gold.
It seems crazy, but one of the best things I could see with this idea was that there would be no awkward attempt at painting my right hand.  Just stick them on and go...
The time that it took me to get all the nails on, my painted nails could have been so dry I could dig for my keys in my purse :)

The good part is that they are stickers.  There shouldn't be any goldish lines on my papers tomorrow.  The bad part is, I'm still completely uncoordinated as proof by my unstraight, bubbled up stickers on my right hand (shown below).
I keep smoothing them down...they definitely aren't perfect.  I probably should have pressed each nail for 30 seconds like it said to do...but I'm too impatient for that!

Another color might have been better (if its available).  Dustin told me they looked like superhero nails...I don't think he meant that as a compliment :)

Of course, if they really stay on for 10 days, that will be pretty super!

My guess is that I will wake up in the morning with one stuck in my hair, one in the blankets, one on my pillow, one in my mouth and if I'm lucky the other 6 will be right in place!

Thursday, February 17, 2011

When you want to throw something at your husband...

So back to the rollers (shown in the picture of Project 2: Doll House), well they were going to paint the base coat for the bean-bag toss "we" decided to make.  I use "we" loosely...Dustin decided he liked me better with all my appendages...so he became my cut man.  However, he talked me out of the base coat so I still have extra rollers but they are now in the basement instead of on the kitchen table.

This was actually pretty fun.  Here's what you need to get started...

4x6 Foot plywood board
a projector


transfer paper (you can't see it, it's invisible!)
paint, paint brushes and a black marker for tracing


Here's what you do:

Copy or draw a picture onto transfer paper.
Use the projector to display the desired image on the plywood
Trace the picture onto the plywood
Paint the picture
Have Dustin cut it out (with a jig-saw) and put hinges on the back so it will stand up and fold flat.
Use frozen milk jugs to hold down the glued boards which the hinges will be affixed to.

Meanwhile...
Made the bean -bags using a hankie (that's using a clean hankie not using a used hankie, just to clarify)
Cut  8 squares small enough to fit through the hole and sewed 3 sides of 2 squares together
Fill the 3/4 sewn bags with Northern Beans and sew the open side shut
Now they're full of beans too :)
Dusty is ready to go!  He is all ready for the Longview Farm Elementary School Carnival.
Why Dusty?  After Dustin...and from being stored for a year between carnivals...he is going to get pretty "Dusty"!  Can't wait to throw a hankie at a larger than life replica of my husband :)

Tuesday, February 15, 2011

Project 1: Tear Drop Trailer-Day 3!


You have to admire their dedication!


"Arial view"
Taking off the flooring
No more floor!
Ah-Oh!  You guys giving up?  Going to throw it into the scrap pile?
...I guess not!


Saturday, February 12, 2011

Get a free cookie with any purchase February 14th

Get a free cookie with any purchase February 14th

Cinnamon Ornaments

Just in time for Valentine's Day.  These make a great inexpensive Valentine treats!  Not the kind of treat you can eat but still almost as enjoyable!

Cinnamon Ornaments

Ingredients:
3/4 C. Applesauce
1  C. Cinnamon
2 T. White Glue
1 T. Cloves
1 T. Nutmeg


Mix throughly
Roll out like pie dough
Cut desired shapes.  
Poke one hole in the center-top portion of the hearts (for a ribbon for hanging after completion)
Let dry in unlit gas oven over night or in an electric oven on warm heat overnight (approximately 8 hours)

After drying time has passed, tie a ribbon through the hole and make a bow at the top.  You may also add other decorations by hot gluing them.  on.

 Fun, easy to make and inexpensive!  Cinnamon can be pricey, but for this "recipe" the cheap cinnamon from the local dollar store works great!

Anyone would LOVE to receive one of these fragrant filled hearts!

Well they're finished, 170 degrees and 8 hours later.
I used about 3/4 of the ingredient amounts and it made 17 hearts but this will depend on how big you make them.
You can also make these at Christmas time and use them for tree ornaments!


Blogging tips